Hey there! A couple of weeks ago I was delighted to be featured on the amazing blog: Tatertots and Jello!
In case you missed my post over there, I wanted to be sure to share it with you here, as it’s such a cute and easy project…
painting mason jars!
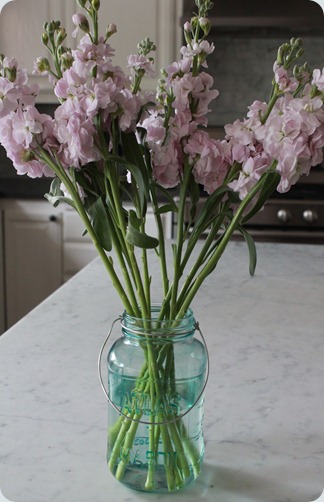
I love all the mason jars I’m seeing everywhere in catalogs and blogland. I especially adore the old vintage blue jars I’ve seen used for candles or flowers or anything for that matter. Instead of searching thrift stores {not my children’s favorite pastime……..yet} I decided to make my own. And it turned out to be super easy!
First I did a Freecycle post looking for free mason jars {do you freecycle? it’s like craigslist but all items are free} I ended up with several dozen! Most of them are just spaghetti sauce jars, but when spruced up, they can fool you into thinking they are from an old vintage kitchen.
I picked up this glass paint from Michael’s….Vitrea 160, in turquoise. I also grabbed some thinner from the Vitrea 160 collection. 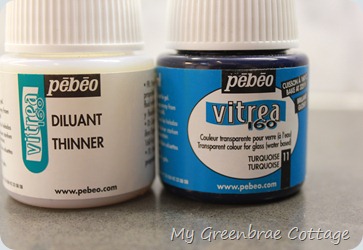
I gathered my materials: clean mason jars, paint brush {which I decided later was not the best way to apply the paint}, bowls to mix paint.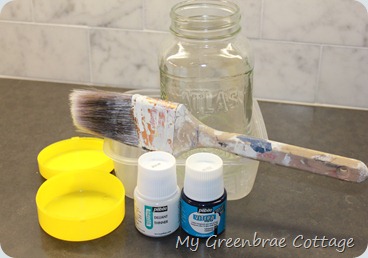
First I thought I’d try diluting the paint with regular ‘ol paint thinner. Made sense to me at first…
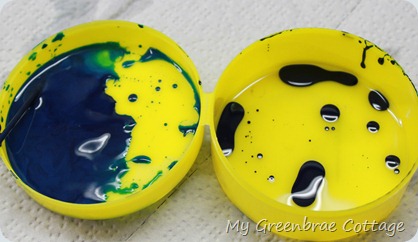
but you’ll see on the right {above} the turquoise just beaded up when mixed with regular paint thinner. So then I mixed it with the Vitrea thinner and it worked much better {tray on the left}. I started with about a 50/50 solution of paint to thinner and later realized that I only need a TINY amount of the turquoise to achieve the faint blue color I was hoping for.
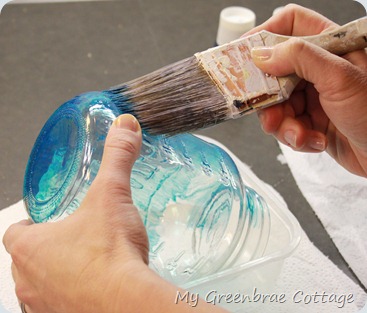
I started off by brushing the paint on. I used a large brush, hoping to have as few brush strokes as possible.
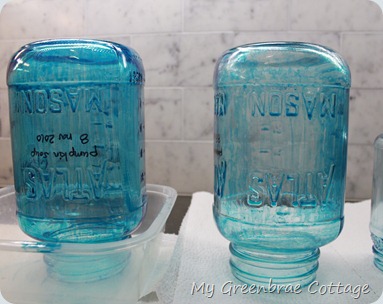
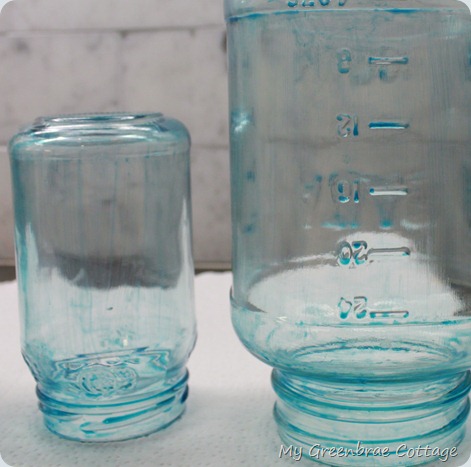
Both of the jars above were done with a paint brush. The first was a 50/50 ratio or paint to thinner. The second was about 30/70 paint to thinner. {Noticed I used the least attractive of my jars: labeled pumpkin soup, for my guinea pigs!}
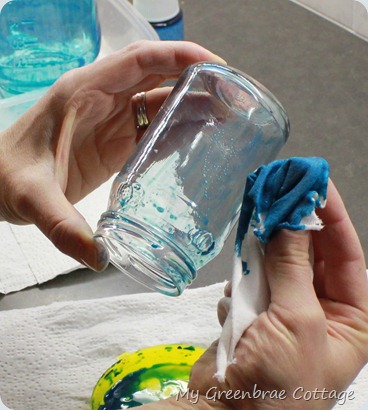
Then I switched to a rag for the paint application:
I liked the rag MUCH better. I got a smoother finish and less of that brush stroke look. Also I thinned the paint much more by this point. I was using probably 20% paint and 80% thinner.
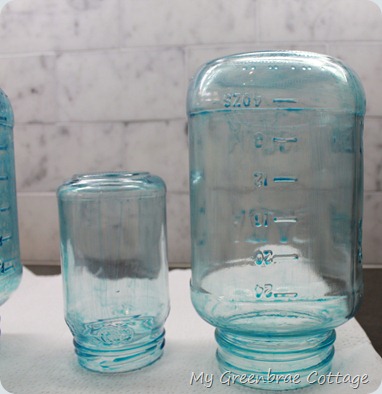
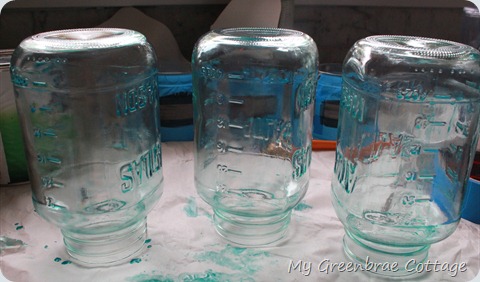
Above are the next two jars that were done with the rag instead of a brush and with a ratio of around 20/80 paint to thinner.
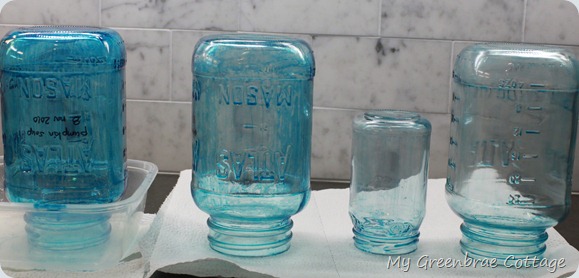
Here’s all 4 jars lined up for you to compare. The far left is 50/50 paint to thinner and brushed on. Next is 30/70 paint to thinner and also brushed on. The last two on the right are both 20/80 paint to thinner and applied with a rag.
You’ll notice you can still kinda see some strokes of paint {even with the rag} and also places where the paint is thicker than other places…but when you bake the color on and fill them with water and flowers, that all fades.
Once I had my technique mastered, I did a few more.
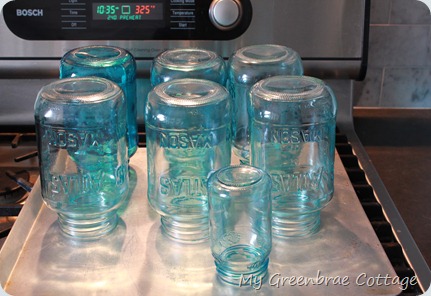
Ok, so next step is to bake the jars in the oven. This step locks the color in, makes them dishwasher safe and gets rid of that tacky/sticky feeling they have. First let them dry for 24 hours. Then bake the jars in a 325o oven for 40 minutes.
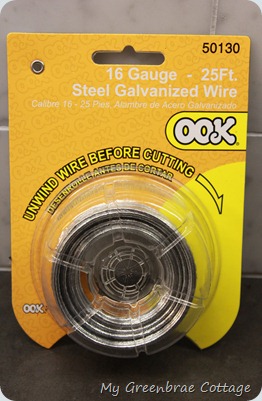
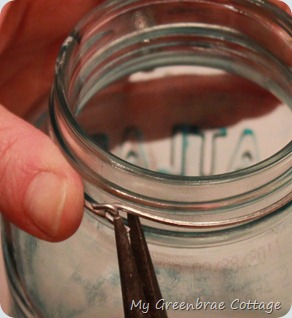
And then I thought I’d accessorize them just a tad by adding some wire around the neck and as a handle. I bought this steel wire from Home Depot. It bends pretty easily, but the next thinner gauge would have worked well too.
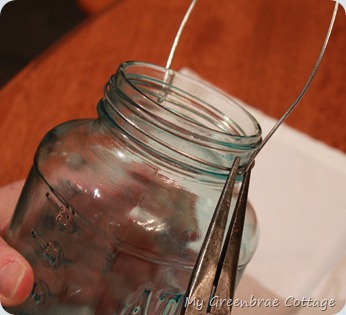
I just wrapped it around the jar and cut. I crimped down the ends with my wire cutters. 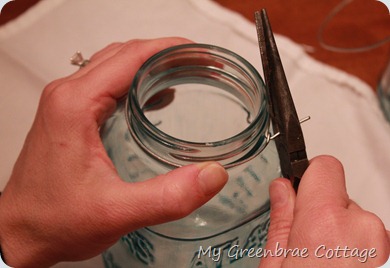
Then I eye-balled how long I wanted the handle, added a bit more for twisting it on and cut.
And there you go! “Vintage” blue mason jars! 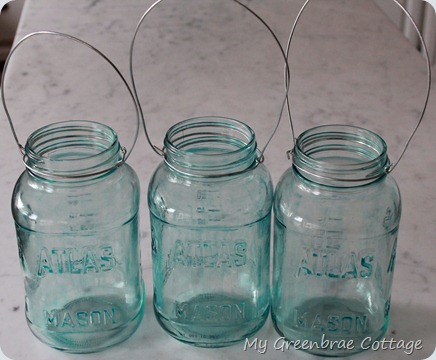
I just love how the color came out. So faint and refreshing…...just beach-y! 
Thanks a million to Jen for featuring me on her amazing blog Tatertots and Jello!
I've seen this post before. What a great way to paint these jars!! I was at the flea market this weekend, and i always find the clear jars...but never the turquoise ones...this is a great way to get my look, for less. Thanks for sharing!! ;)
ReplyDeleteThis is such a better alternative. I've seen those jars at upwards of $20 at certain antique stores. This is much better :)
ReplyDeleteThat is really cute....I have tons of spaghetti and jelly jars around here, I like to use them in my craft and sewing area for storage but I might just try this painting technique.....they'll be really pretty outside hanging or on tables with some sand and candles :)
ReplyDeleteOh and isn't freecycle the BEST!
"She's Crafteeeeeee!"
ReplyDeleteVery crafty. To bad you missed out on the jar link party at my place. You created something beautiful!
ReplyDeleteLove these..., and really like the wire hanger detail!!! I recently did a post on painted glass jars..., you can check it out here to see. Definitely will show yours (as another great example) in my weekend coastal mix post.
ReplyDeleteI had no idea that jars could be painted! Amazing. Turquoise Bell jars are my very favorite thing to decorate with. I may just have to try this. Thanks for the great step by step tutorial :)
ReplyDeleteLove the finished product - I'm crazy about Mason jars and don't have a single blue one....yet!! I'm a new follower visiting you from The Lettered Cottage blog party today. Have a lovely week.
ReplyDeletehttp://SallyLeeByTheSea.com
wow, these are lovely.. I found you via stories of A to Z, I'm looking forward to following your blog!
ReplyDeleteWhat a fantastic idea! The jars are so pretty! You did come up with just the right shade of blue. Thank you for sharing this! I popped over from the party at A to Z. Great project!
ReplyDeleteBrilliant!!! I have to share this on my FB page! I have one of the blue mason jars but I am dying for some more!!!
ReplyDeleteawesome! Thanks for sharing. I'm gonna do this as my neighbor gave me all her canning jars, plus a few that I think needed throwing out, but I'll use them this way. Reuse and recycle, as they say!!!
ReplyDeleteI have been using these paints for years...and they're wonderful. However...I suggest that ANY painted glass should NOT be put in the dishwasher. Yes, the paint will adhere...for the first washing or so, but the detergents and even the sprayers are too harsh for multiple uses and the paint will chip away. Rule of thumb...was painted glass by hand.
ReplyDeleteJane (artfully graced)
I have actually been searching for some of these! Guess I can just make my own now - thanks so much for the tutorial. "Pinning" it!
ReplyDeleteNO WAY!!!! I have been looking for a way to do this and FINALLY I found my answer!! You are completely amazing and thank you! Just what I've been looking for!!
ReplyDeleteYour newest follower :)
Aww, Thank you!! and Welcome!
DeleteThat's awesome! Great job and great tutorial. I also love the blue green jars. My favorite!
ReplyDeleteHi Jen,
ReplyDeleteI'm giving this a try... do you mind if I link back to you in my post?
Thanks a lot
Susan @ homeroad
I have been searching for the paint in turquoise, and I just found out its been discontinued. :( I bought a blue color and is just doesn't come out the same. I may try to mix it with some green and extra paint thinner. Do you think another glass paint would work? Thank you.
ReplyDeleteI have been searching for the paint in turquoise, and I just found out its been discontinued. :( I bought a blue color and is just doesn't come out the same. I may try to mix it with some green and extra paint thinner. Do you think another glass paint would work? Thank you.
ReplyDeleteI have been searching for the paint in turquoise, and I just found out its been discontinued. :( I bought a blue color and is just doesn't come out the same. I may try to mix it with some green and extra paint thinner. Do you think another glass paint would work? Thank you.
ReplyDeleteYes, I would imagine any brand glass paint would work. So sorry they don't have the turquoise anymore. What a bummer!
DeleteI have been searching for the paint in turquoise, and I just found out its been discontinued. :( I bought a blue color and is just doesn't come out the same. I may try to mix it with some green and extra paint thinner. Do you think another glass paint would work? Thank you.
ReplyDeleteI haven't tried any other glass paint, but I would guess another brand would work. Let me know if you do!
DeleteWhat do you think would happen if you poured the paint into the jar,swirled it around ,turned it over and let the residue drip out....would the effect be the same? Would the paint stay on if you baked it?
ReplyDeleteHum, I think you'd need to thin it out a TON for that to work. I can kinda imagine it streaking potentially. But maybe no worse than with the rag? You'd need a good deal of paint and thinner I'd guess. Just to have enough to swirl around? Let me know if you try!
Deleteok, read most of the posts...I have a dumb question...
ReplyDeletedid you paint only the outside of the jars or did you do the insides as well? See told you it was dumb
I only painted the outside...and that's not a dumb question at all!
DeleteWould this be food safe ,
ReplyDeleteI'm not sure it would be food safe...but I only paint the outside of the jars, anyways, so it should be food safe. But I wouldn't paint inside the jars if you want to store food in them.
DeleteThis comment has been removed by the author.
ReplyDeleteHello,
ReplyDeleteI was wondering, could you use solid 16 gauge electrical copper ground wire so you would have copper instead of a steel look?
Yes, copper wire would look nice too. Also, I would use 18 gauge next time as the 14 and 16 are both a tad heavy. You could also buy very very thin gauge wire and twist two together. That would be cute.
Delete